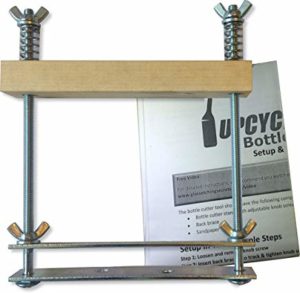
 We recently released an add-on attachment that allows you to quickly and easily score the bottles without attention to pressure application. Now you can cut bottles perfectly without requiring any skill to making scoring the line easier than ever. This attachment kit is sold on Amazon here.
Thank you for ordering our new Spring-Loaded Attachment Tool! After testing several brand of bottle cutters, we believe ours is one of the best available. However, after being in business for several years, we realized some folks couldn’t score the bottle well to achieve perfect cuts. This is all due to how well of a consistent and deep score line the user creates.
It takes a little understanding and practice to get it perfect every time, but now this new add-on device does it for you which requires less attention to scoring pressure. The tightened springs apply a consistent pressure to score the bottle while you turn it. It also helps to hold the bottle evenly.
Parts Included:
Assembly is required. The following components should be included:
- 4 washers
- 4 wingnuts
- 2 long bolts
- 2 springs
- 2 metal braces
- 1 cross board
Setup
Step 1: Tighten to Bottle Cutter Main Board
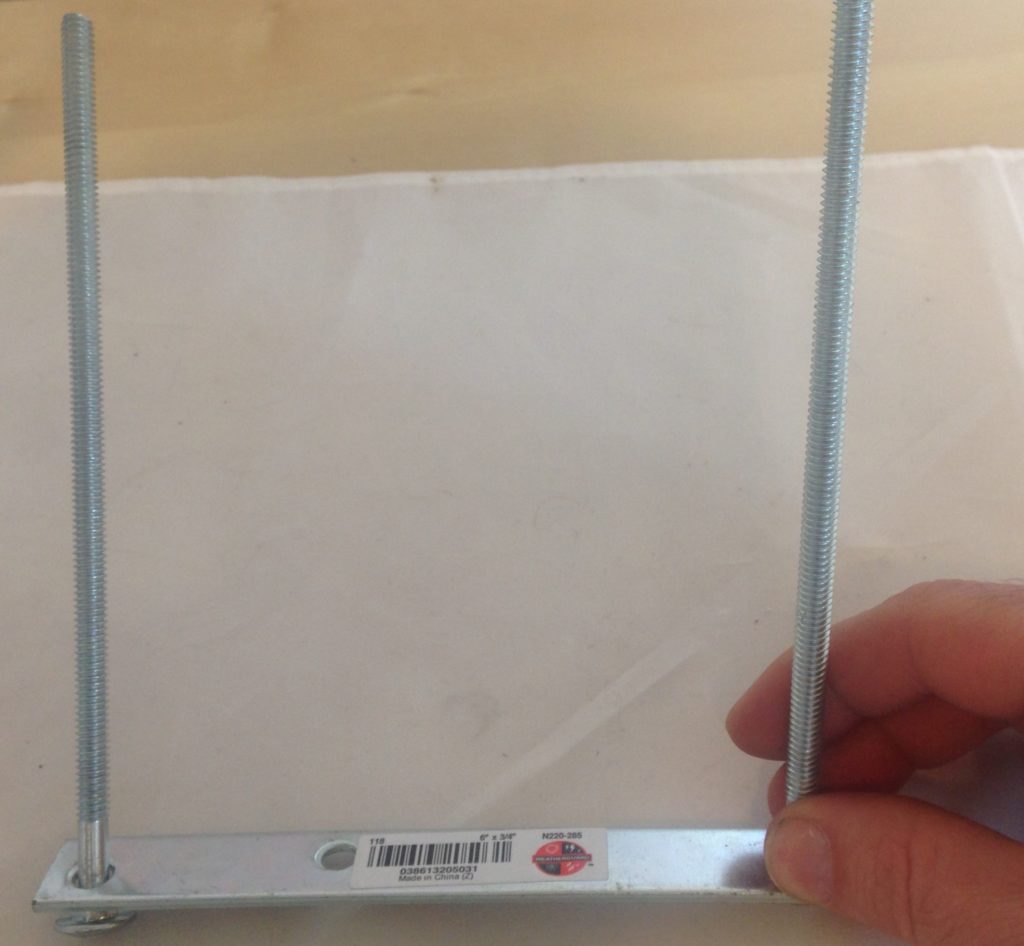
Simply place the two bolts through one of the metal braces as shown in photo below.
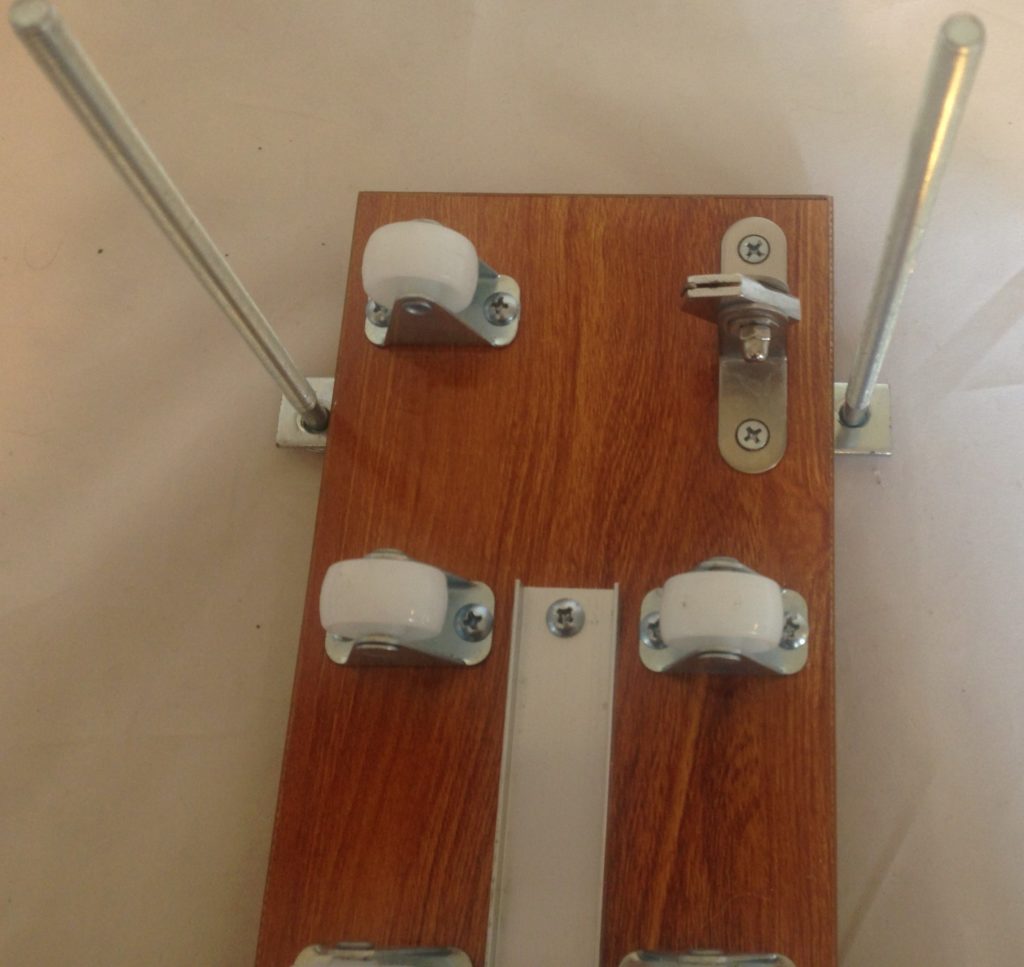
Then place it under the bottle cutter main board.
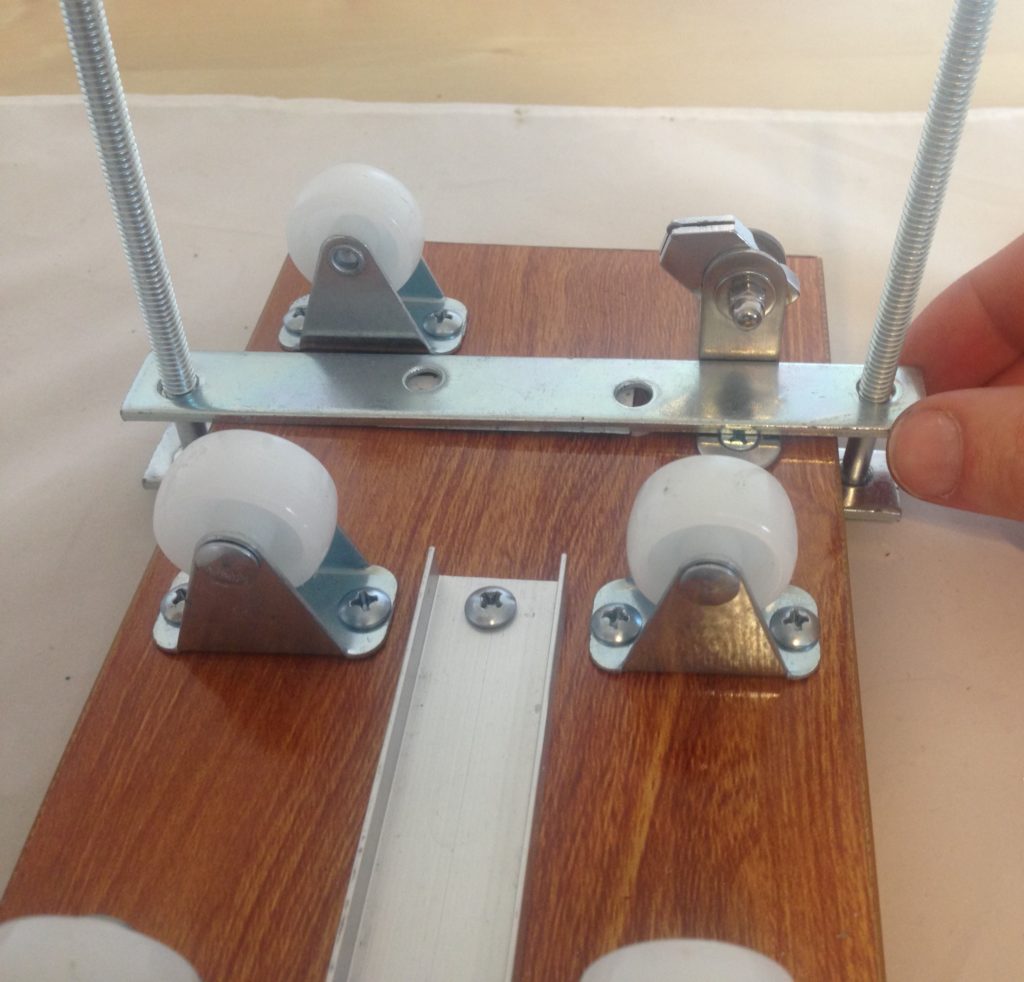
Slide the second metal brace over the two bolts so it is on top and clamps down on the main bottle cutter board. The device should be aligned in between the blade and rollers, but as close to the blade as possible.
Slide a washer and thread a wingnut down on each of the bolts.
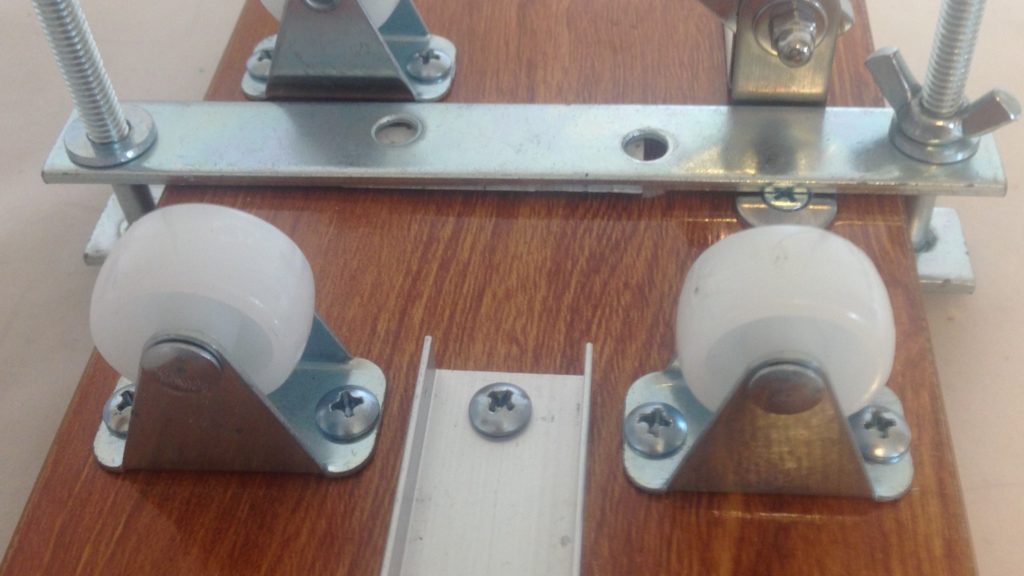
Tighten the wingnuts as much as possible to reduce wobble. Try to tighten both sides roughly the same amount so it is even.
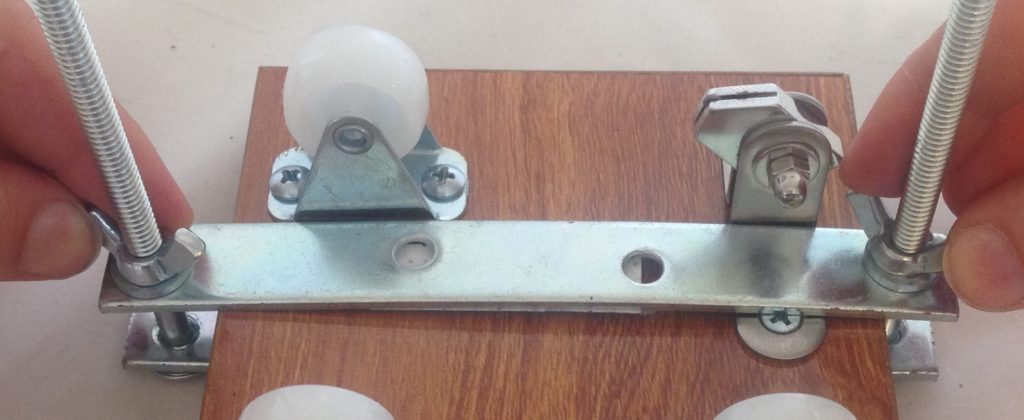
Step 2: Assemble Top Spring-Force Section
Slide the wooden cross board over the top of the two bolts. If the bolts bow away from the holes, pull them back or temporarily loosen the bottom wingnuts so the holes line up.
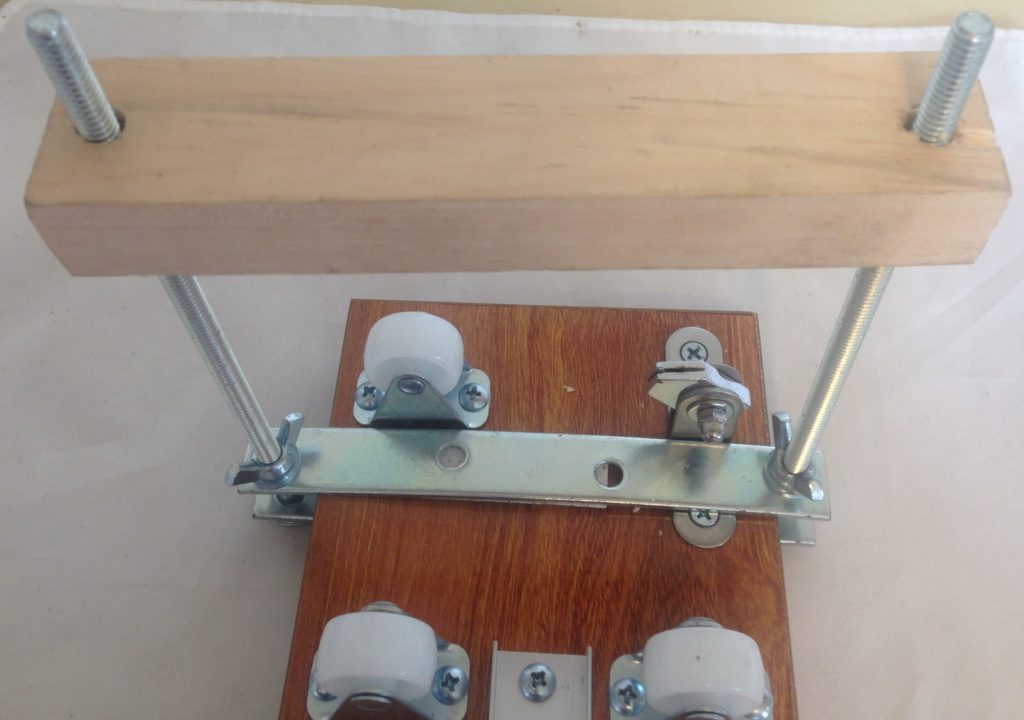
Slide the spring, followed by a washer and tighten the wingnut on each of the bolts. That’s it!
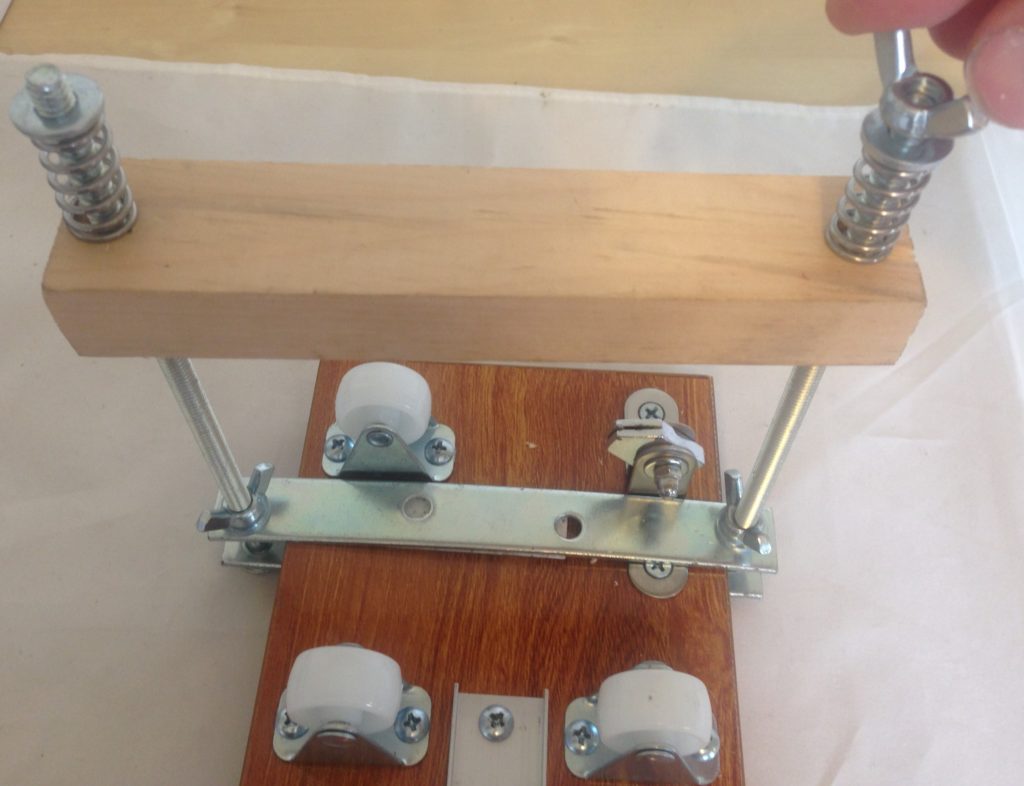
Instructions: How to Cut a Bottle with the Attachment Tool
The instructions below lists the steps. However, you can view the steps with pictures listed under the how to section for our our bottle cutter model that has this attachment built into the board here since the process is the same.

Step 1: Loosen the top wingnuts and pull the cross board up until the bottle fits in between it and the rollers.
Step 2: Once bottle is positioned where you want to cut it, tighten the wingnuts so that it compresses the springs about a quarter to half way.
The amount you compress the springs may vary depending on how thick of a bottle is used. Too much pressure may crack the bottle, while too little may not be enough to score the bottle deep.
Rule of Thumb: Wine bottles aim for the springs to be compressed almost halfway while beer bottles are around a quarter the way compressed.
Step 3: Remember to adjust the back metal brace so it touches the bottle of the bottle. This will prevent the bottle from spiraling.
Step 4: Roll the bottle around once and loosen the top wingnuts to remove the bottle.
Cut Bottle Separation
As you may know, after the bottle is scored it should be inspected and use the hold/cold technique to separate it.
Step 5 Inspect Score Line—IMPORTANT!
It is important to turn a consistent score line depth or the bottles may crack in the following steps. Observe any areas that are lighter than the rest of the bottle and score only those areas a second time so the line looks perfectly consistent around.
Step 6: Heat up the score line
The most popular way to heat the score line is to heat up water on the stove to a near-boiling temperature and pour it over the cut but this is a hassle, takes too much time and creates more waste. We found the better way is to apply heat over the line with our heat gun tool for ~40 seconds while rotating evenly.
Warning! Some of our premium kits include an electric heat tool. If you use this or any other heat gun, be sure to use it at safe distances away from your water source. Also, be sure to remove any inside contents, caps or corks from bottles to prevent pressure build up and exploding glass.
Step 7: Apply a light stream of cold water over score line while turning and lightly pull to separate.
Step 8: Wet the sandpaper and rub over the top, inside and outside of the cut edges to a desired smooth finish.
Caution: glass edges will be sharp! Also, sanding glass can emit dust in the air that may cause silicosis of the lungs. It is best to wear an approved dust mask and keep your face as far of a distance as possible to prevent inhaling dust. The faster the sanding process, the greater possibility of dust. Wet sanding with water will greatly reduce this risk.
